Inflatable paddle boards, also known as blow up paddle boards or iSUPs have become very popular for their many advantages. They are easy to transport, require less storage space, are generally cheaper than hard boards and can last for years because they are super durable. Best of all, you can take an inflatable paddle board anywhere and they’re ready to go in minutes.
What gives an inflatable paddle board its shape and structure?
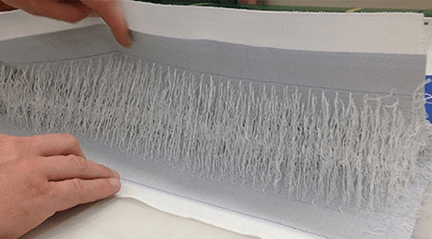
Drop stitch (also called double wall fabric) is at the heart of all inflatable boards. It's a relatively new concept where the surfaces of the fabric are connected to each other through vertical pile fibers. Basically, it is thousands of polyester threads woven into the bottom of the base material to make sure when the threads hit their maximum length, there will be no over-inflation. They are woven so thin that when the board is deflated, the two layers can collapse together almost completely flat, allowing the board to be rolled up and stored in a much smaller space. Drop stitch comes in many thicknesses but the most common for inflatable paddle boards is 4- or 6- inch drop stitch.
How is welding technology superior to gluing methods?
- Using hot air welding to create your inflatable paddle board will create a stronger, longer lasting paddle board that in turn, is better for the environment.
- Gluing the top and bottom of the sidewall is extremely labor intensive. Replacing gluing with welding enables some of our customers to experience a 10-fold time savings.
- Because you are able to weld and finish your paddle board in one step, this also helps greatly reduce your manufacturing time.
- Welding creates an airtight seam without the risk of glue weakening over time.
- Glue has a short lifespan and your product will end up as landfill after just a few years.
- Welded seams for your inflatable paddle board are the same seams created for white water rafts, emergency evacuation slides and life vests.
What are the steps to creating a dropstich paddle board?
- Choose your material size
- If you want to create a boxier shape, the diameter of your sidewall should be equal to the thickness of your drop stich material.
- If you want a rounded shape/finish, the side wall should be an inch or an inch and a half shorter than the drop stitch.
- Align the top of your fabric to the bottom of your fabric to eliminate any skew in the product.
- Mark your pattern on the material.
- Clamp material into place for precise cutting.
- Cut your drop stich material
- Use an ultra-sonic cutter to weld and cut in one pass with perfectly sealed edges.
- An ultra-sonic cutter is critical to tack the drop stitch material to itself for ease of running through the machine
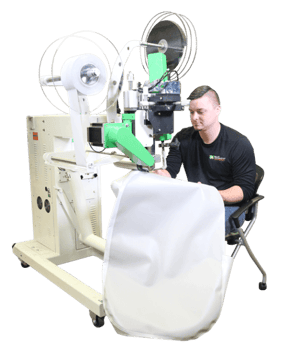
- Weld sidewall (or rail) to the drop stich material
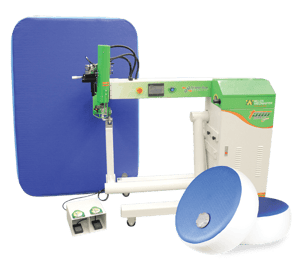
- Using your T300 Extreme Curve double-wall welding machine, weld one side of your sidewall.
- Close sidewall, flip over and begin final sidewall seam.
- Be sure to leave 5” of sidewall unwelded for valve placement.
- Insert the valve
- Rip tacked drop stich material
- Slice a small hole where valve is to be inserted.
- Insert your valve.
- Weld the last 5” of sidewall.
- Inflate and enjoy!
If you would like to view a visual guide to creating an inflatable on our T300 Extreme, please view this video: https://youtu.be/BGGoRizJegk
Paddle boarding is becoming more and more popular and is even an activity you can do while practicing social distancing! If you would like to join the very small group of American manufacturers creating inflatable paddle boards, we would love to help you get started. Please contact sales@weldmaster to get started.