This instruction manual is intended to be a guide when operating the Digitran Sewing Machine. To ensure optimal performance from your welder, please follow the recommendations and specifications precisely.
Table of Contents
- Chapter 1: Intended Use
- Chapter 2: Digitran Sewing-Head Screen
- Chapter 3: Additional Machine Documents
For more technical information regarding this machine call our Resolution Center at 1-855-888-WELD or email service@weldmaster.com.
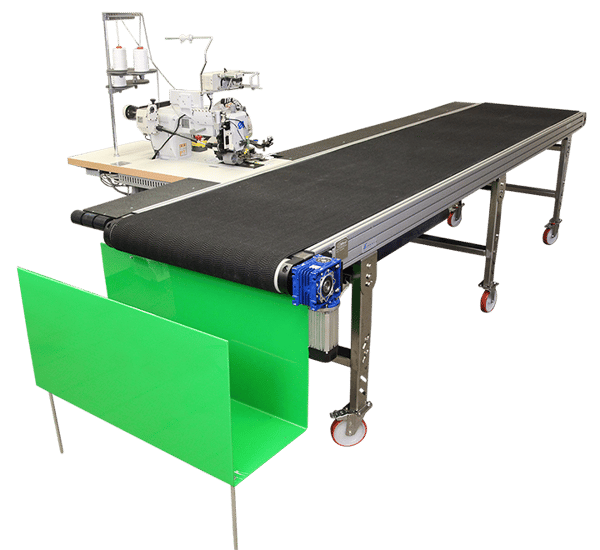
1.0 Intended Use
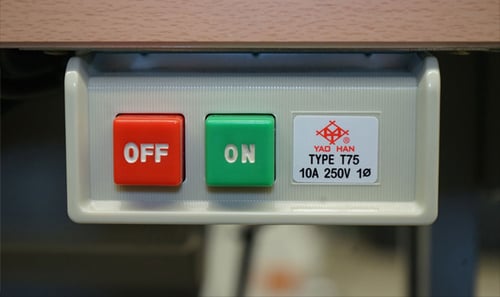
Master Power:
With all components included in the Digitran sewing system switched to “power on”, the operator can turn the entire system on or off by using the master power buttons facing the operator immediately below the sewing head table.
NOTE: Each component can be turned on or off individually as well.
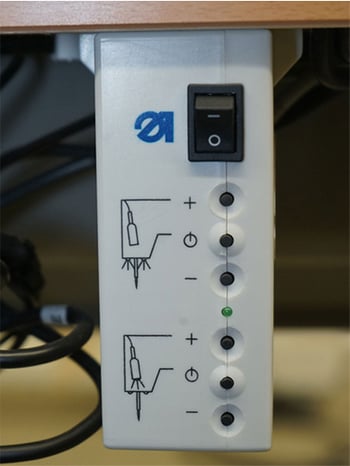
Sewing Head Lamp:
Use the switch on the sewing head lamp control unit to turn the lamp above the sewing needles on/off.
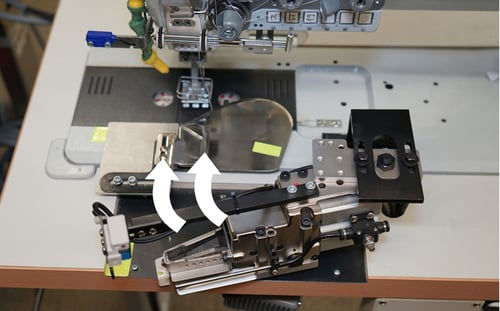
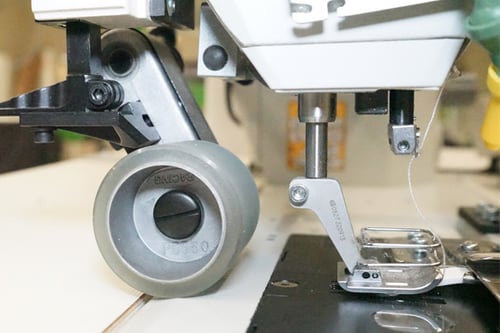
Automatic SEG Cutter:
To utilize the automatic SEG cutter, first loosen the locking bolt at the top of the cutter assembly and swing the cutter into position. Lock the cutter into position by tightening the locking bolt.
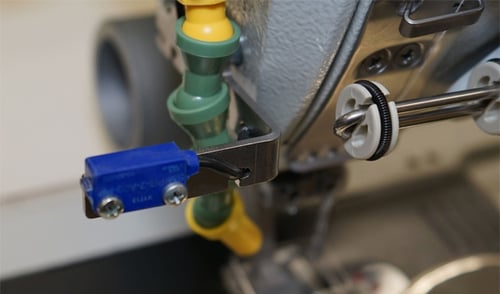
When the material being sewn passes the light barrier mounted on the cutter assembly, the cutter will initiate the cut automatically after a predetermined number of stitches.
The number of stitches completed after crossing the light barrier before the cut is initiated is displayed and can be adjusted on the interface mounted to the right of the cutter. To increase or decrease the number of stitches prior to cutting, first press the “end cut” button. The number will flash. Use the + and - buttons to adjust the number. Once you have selected the desired number, press the “Auto” button.
NOTE: There is no need to set or adjust a “start cut” because the start position of the SEG is determined by how the operator positions the SEG relative to the material prior to sewing.
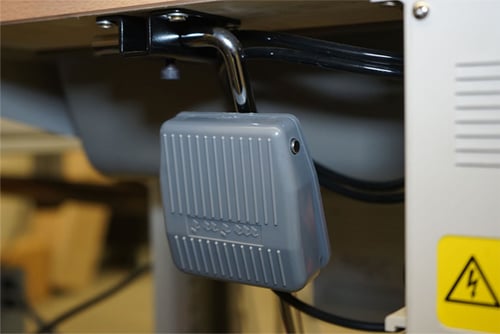
The cutter pedal positioned in front of the operator directly below the sewing table can be used to initiate a cut manually.
Top Mounted Hook and Loop/Webbing Feeder:
To utilize the hook and loop/webbing feeder, first mount the spool onto the mount on top of the feeder.
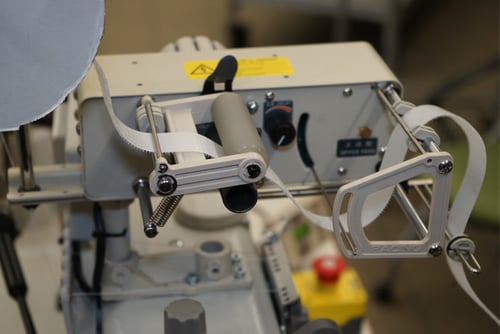
Loosen the stop closest to the outside of the mount and remove it. Place the spool on the mount and re-install the stop. Secure the spool between the stops.

Next, run the hook and loop/webbing through the entry guide and through the pressure rollers. Then underneath the trigger rod and into the next guide. All of the guiding is adjustable to accommodate different widths of hook and loop/webbing.
NOTE: It is best to do this with the feeder off, so that the trigger does not initiate the rollers as you are completing the set-up.
Run the hook and loop/webbing down to the lower guide mounted on the feeder and then down to the final guide which is mounted on the sewing machine above the needles. This guide will need to be flipped down into position manually and the guide ends positioned to feed the hook and loop/webbing into the needles as desire.
NOTE: Be sure to turn on the feeder.
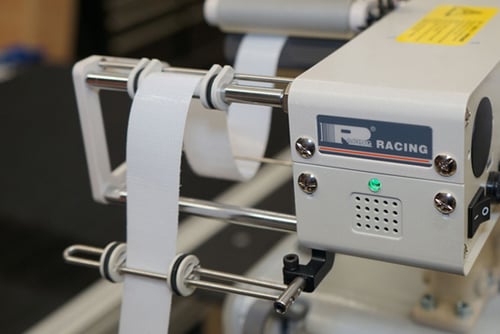
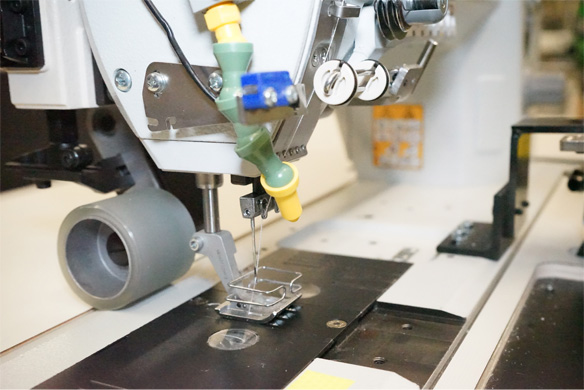
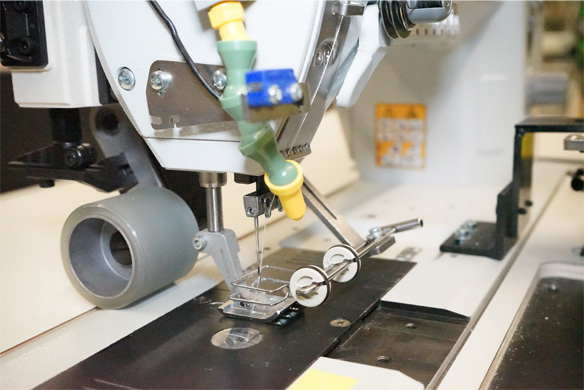
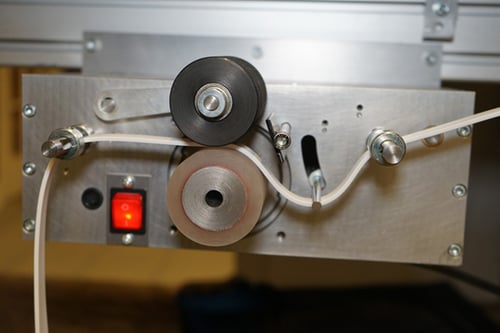
SEG Feeding System:
To utilize the SEG feeding system, first mount the spool of SEG onto the horizontal shaft on the back end of the conveyor belt.
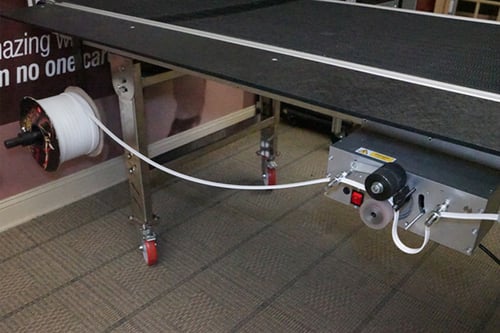
Next, run the SEG through the entry guide and through the pressure rollers. Then underneath the trigger rod and into the exit guide. All of the guiding is adjustable to accommodate different widths of SEG.
NOTE: It is best to do this with the puller off, so that the trigger does not initiate the rollers as you are completing the set-up.
Run the SEG up the guide track and through the port in the trim on the operator’s side of the conveyor belt.
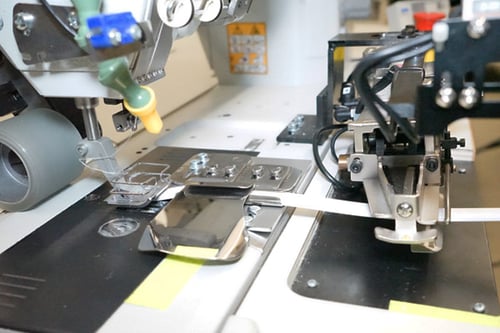
Finally, run the SEG through the SEG track of the material guide and into position under the sewing foot. Swing the automatic cutter into place and manipulate the SEG between the resting platform and the blade.
NOTE: Be sure to turn on the puller.
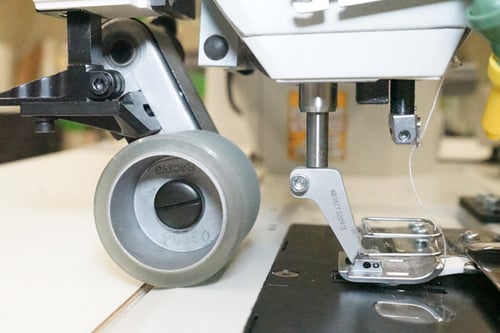
Puller Roller Assembly:
To utilize the puller roller, use the lever mounted on the left of the sewing head to drop the roller into position.
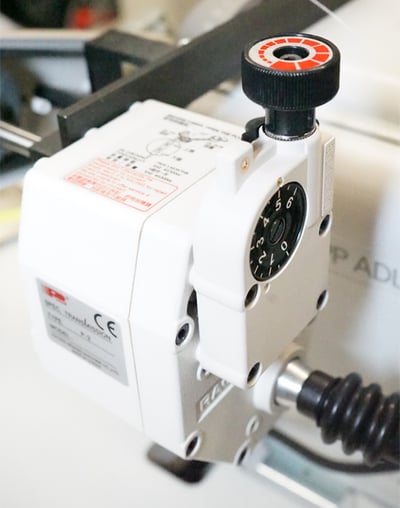
To adjust the speed of the roller, use the knob at the top of the puller roller gear box. The display on the side of the gear box will indicate the speed setting numbered 1 to 6 with 6 being the fastest.
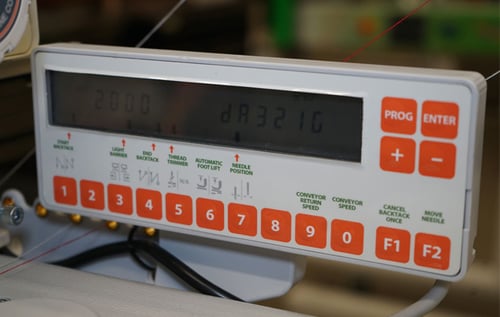
2.0 Digitran Sewing-Head Screen
The MW decal for the sewing-head screen simplifies set up of the sewing head functions for the intended use of this system. Where upward pointing arrows are featured on the decal, there should be a corresponding, downward pointing arrow on the screen. If the arrows do not line up, press the button corresponding to the arrow that is missing or in the wrong position until the arrow appears in the correct spot.
NOTE: Pressing any button 3 times will cycle through all possible options for that feature. Press until the arrow is in the desired position for each.
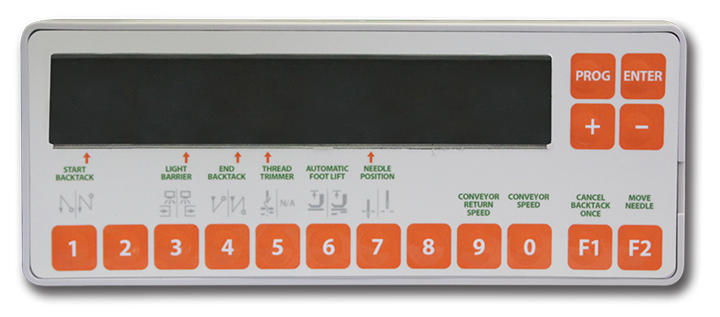
Screen Features:
Start Backtack (#1): This feature controls the direction and amount of stitches for the start backtack. With the arrow on-screen corresponding to the arrow on the decal, the backtack will begin where the operator positions the material under the needle. The seam will advance for the preset number of stitches, return to start, and continue the seam again from the start.
To adjust the number of stitches in the start backtack, press button #1. The number on the screen will indicate the current number of stitches for the start backtack. Use the +/- keys to adjust the number of stitches in the start backtack. Once the adjustment is made, wait about three seconds and the screen will default to the operating screen.
NOTE: Be sure that the arrow on the screen corresponds to the arrow on the decal after adjusting the number of stitches. If not, press the button until the arrow is again in the correct position.End Backtack (#4): This feature controls the direction and amount of switches for the end backtack. With the arrow on-screen corresponding to the arrow on the decal, the sewing head will advance for the preset number of stitches after the material bypasses the light barrier (see Light Barrier (#3)). The sewing head will then backtack for the preset number of end backtack stitches, and then advance back to the end of the seam.
To adjust the number of stitches in the end backtack, press button #4. The number on the screen will indicate the current number of stitches for the end backtack. Use the +/- keys to adjust the number of stitches in the end backtack. Once the adjustment is made, wait about three seconds and the screen will default to the operating screen.
Thread Trimmer (#5): This feature automatically cuts the needle and bobbin thread upon completion of the seam. With the arrow on-screen corresponding to the arrow on the decal, the sewing head will trim the thread after completing automatic backtack. The sewing head is then ready to begin another seam.
Automatic Foot Lift (#6): This feature allows the operator to set the foot to be lifted automatically at desired intervals. The foot can be set to be lifted at all times, at the conclusion of a seam, or only manually. The MW decal has no arrow indicated on this button, meaning that the foot will only be lifted when the operator does so with the foot pedal. This prevents material from moving around while not sewing.
Needle Position (#7): This feature determines the position of the needle upon completion of the seam or when the operator stops sewing mid-seam. With the arrow on-screen corresponding to the arrow on the decal, the sewing head will stop sewing with the needle in the down position. This allows the operator to save the location where the seam was interrupted if they must stop sewing mid-seam.
Conveyor Return Speed (#9): The conveyor return speed is the rate at which the conveyor moves when the return pedal is engaged. Because this number is a ratio of the RPM at which the sewing head is operating, decreasing the number represented will increase the speed. Adversely, increasing the number represented will decrease the speed. To adjust the conveyor return speed, press the button and press the +/- buttons to increase or decrease the number.
Conveyor Speed (#0): The conveyor speed is the rate at which the conveyor moves when the sewing pedal is engaged. Because this number is a ratio of the RPM at which the sewing head is operating, decreasing the number represented will increase the speed. Adversely, increasing the number represented will decrease the speed. To adjust the conveyor speed, press the button and press the +/- buttons to increase or decrease the number.
Cancel Backtack Once (F1): This feature allows the operator to cancel the backtack one time. This is useful if the operator must interrupt sewing mid-seam but would like to resume without having a backtack in the middle of the seam. Pressing F1 before resuming the seam will cancel the initial backtack. Upon completion of the seam, the sewing head will automatically end backtack without any further action.
NOTE: If the work being done requires that multiple consecutive backtacks be canceled, it is more effective to turn off the start and end backtacks by pressing buttons 1 and 3 each until no arrow is illuminated on the screen above those buttons.
Move Needle (F2): This feature will move the needle(s) to the opposite position each time that it is pressed. The needle(s) will end sewing in the up position. Pressing this button will move them to the down position. Pressing again will move them back to the up position again.


